KubeVirt: installing Microsoft Windows from an ISO
Warning!
While this post still contains valuable information, a lot of it is outdated. For more up-to-date information, including Windows 11 installation, please refer to this post
Hello! nowadays each operating system vendor has its cloud image available to download ready to import and deploy a new Virtual Machine (VM) inside Kubernetes with KubeVirt, but what if you want to follow the traditional way of installing a VM using an existing iso attached as a CD-ROM?
In this blogpost, we are going to explain how to prepare that VM with the ISO file and the needed drivers to proceed with the installation of Microsoft Windows.
Pre-requisites
- A Kubernetes cluster is already up and running
- KubeVirt and CDI are already installed
- There is enough free CPU, Memory and disk space in the cluster to deploy a Microsoft Windows VM, in this example, the version 2012 R2 VM is going to be used
Preparation
To proceed with the Installation steps the different elements involved are listed:
NOTE
No need for executing any command until the Installation section.
-
An empty KubeVirt Virtual Machine
apiVersion: kubevirt.io/v1alpha3 kind: VirtualMachine metadata: name: win2k12-iso spec: runStrategy: Halted template: metadata: labels: kubevirt.io/domain: win2k12-iso spec: domain: cpu: cores: 4 devices: ... machine: type: q35 resources: requests: memory: 8G volumes: ... -
A PVC with the Microsoft Windows ISO file attached as CD-ROM to the VM, would be automatically created with the
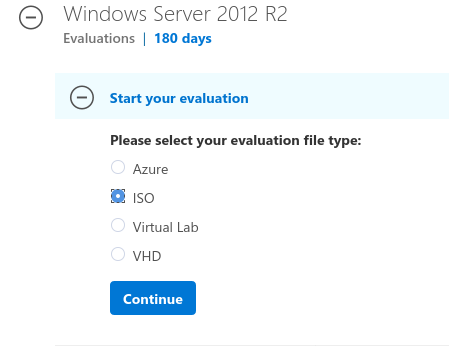
virtctlcommand when uploading the fileFirst thing here is to download the ISO file of the Microsoft Windows, for that the Microsoft Evaluation Center offers the ISO files to download for evaluation purposes:

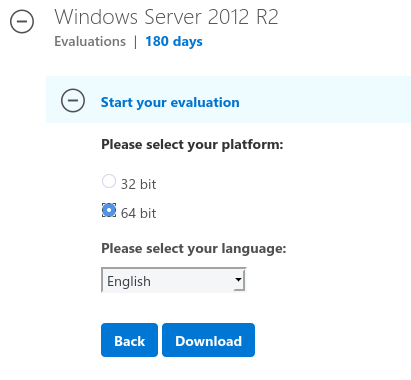
To be able to start the evaluation some personal data has to be filled in. Afterwards, the architecture to be checked is “64 bit” and the language selected as shown in the following picture:

Once the ISO file is downloaded it has to be uploaded with
virtctl, the parameters used in this example are the following:image-upload: Upload a VM image to a PersistentVolumeClaim--image-path: The path of the ISO file--pvc-name: The name of the PVC to store the ISO file, in this example isiso-win2k12--access-mode: the access mode for the PVC, in the exampleReadOnlyManyhas been used.--pvc-size: The size of the PVC, is where the ISO will be stored, in this case, the ISO is 4.3G so a PVC OS 5G should be enough--uploadproxy-url: The URL of the cdi-upload proxy service, in the following example, the CLUSTER-IP is10.96.164.35and the PORT is443
Information
To upload data to the cluster, the cdi-uploadproxy service must be accessible from outside the cluster. In a production environment, this probably involves setting up an Ingress or a LoadBalancer Service.
   $ kubectl get services -n cdi
   NAME              TYPE        CLUSTER-IP     EXTERNAL-IP   PORT(S)   AGE
   cdi-api           ClusterIP   10.96.117.29   <none>        443/TCP   6d18h
   cdi-uploadproxy   ClusterIP   10.96.164.35   <none>        443/TCP   6d18h
In this example the ISO file was copied to the Kubernetes node, to allow the virtctl to find it and to simplify the operation.
--insecure: Allow insecure server connections when using HTTPS--wait-secs: The time in seconds to wait for upload pod to start. (default 60)
The final command with the parameters and the values would look like:
   $ virtctl image-upload \
   --image-path=/root/9600.17050.WINBLUE_REFRESH.140317-1640_X64FRE_SERVER_EVAL_EN-US-IR3_SSS_X64FREE_EN-US_DV9.ISO \
   --pvc-name=iso-win2k12 \
   --access-mode=ReadOnlyMany \
   --pvc-size=5G \
   --uploadproxy-url=https://10.96.164.35:443 \
   --insecure \
   --wait-secs=240
-
A PVC for the hard drive where the Operating System is going to be installed, in this example it is called
winhdand the space requested is 15Gi:apiVersion: v1 kind: PersistentVolumeClaim metadata: name: winhd spec: accessModes: - ReadWriteOnce resources: requests: storage: 15Gi storageClassName: hostpath -
A container with the virtio drivers attached as a CD-ROM to the VM. The container image has to be pulled to have it available in the local registry.
docker pull kubevirt/virtio-container-diskAnd also it has to be referenced in the VM YAML, in this example the name for the
containerDiskisvirtiocontainerdisk.- disk: bus: sata name: virtiocontainerdisk --- - containerDisk: image: kubevirt/virtio-container-disk name: virtiocontainerdiskIf the pre-requisites are fulfilled, the final YAML (win2k12.yml), will look like:
apiVersion: v1 kind: PersistentVolumeClaim metadata: name: winhd spec: accessModes: - ReadWriteOnce resources: requests: storage: 15Gi storageClassName: hostpath apiVersion: kubevirt.io/v1alpha3 kind: VirtualMachine metadata: name: win2k12-iso spec: runStrategy: Halted template: metadata: labels: kubevirt.io/domain: win2k12-iso spec: domain: cpu: cores: 4 devices: disks: - bootOrder: 1 cdrom: bus: sata name: cdromiso - disk: bus: virtio name: harddrive - cdrom: bus: sata name: virtiocontainerdisk machine: type: q35 resources: requests: memory: 8G volumes: - name: cdromiso persistentVolumeClaim: claimName: iso-win2k12 - name: harddrive persistentVolumeClaim: claimName: winhd - containerDisk: image: kubevirt/virtio-container-disk name: virtiocontainerdisk
Information
Special attention to the bootOrder: 1 parameter in the first disk as it is the volume containing the ISO and it has to be marked as the first device to boot from.
Installation
To proceed with the installation the commands commented above are going to be executed:
-
Uploading the ISO file to the PVC:
$ virtctl image-upload \ --image-path=/root/9600.17050.WINBLUE_REFRESH.140317-1640_X64FRE_SERVER_EVAL_EN-US-IR3_SSS_X64FREE_EN-US_DV9.ISO \ --pvc-name=iso-win2k12 \ --access-mode=ReadOnlyMany \ --pvc-size=5G \ --uploadproxy-url=https://10.96.164.35:443 \ --insecure \ --wait-secs=240 DataVolume default/iso-win2k12 created Waiting for PVC iso-win2k12 upload pod to be ready... Pod now ready Uploading data to https://10.96.164.35:443 4.23 GiB / 4.23 GiB [=======================================================================================================================================================================] 100.00% 1m21s Uploading /root/9600.17050.WINBLUE_REFRESH.140317-1640_X64FRE_SERVER_EVAL_EN-US-IR3_SSS_X64FREE_EN-US_DV9.ISO completed successfully -
Pulling the
virtiocontainer image to the locally:$ docker pull kubevirt/virtio-container-disk Using default tag: latest Trying to pull repository docker.io/kubevirt/virtio-container-disk ... latest: Pulling from docker.io/kubevirt/virtio-container-disk Digest: sha256:7e5449cb6a4a9586a3cd79433eeaafd980cb516119c03e499492e1e37965fe82 Status: Image is up to date for docker.io/kubevirt/virtio-container-disk:latest -
Creating the PVC and Virtual Machine definitions:
$ kubectl create -f win2k12.yml virtualmachine.kubevirt.io/win2k12-iso configured persistentvolumeclaim/winhd created -
Starting the Virtual Machine Instance:
$ virtctl start win2k12-iso VM win2k12-iso was scheduled to start $ kubectl get vmi NAME AGE PHASE IP NODENAME win2k12-iso 82s Running 10.244.0.53 master-00.kubevirt-io -
Once the status of the VMI is
RUNNINGit’s time to connect using VNC:virtctl vnc win2k12-iso
Here is important to comment that to be able to connect through VNC using
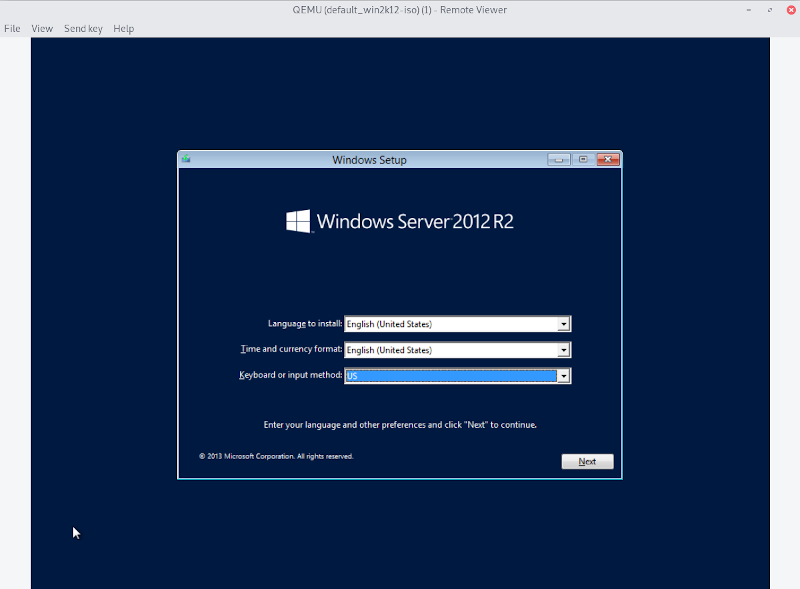
virtctlit’s necessary to reach the Kubernetes API. The following video shows how to go through the Microsoft Windows installation process:
Once the Virtual Machine is created, the PVC with the ISO and the virtio drivers can be unattached from the Virtual Machine.